


Showing posts with label how to. Show all posts
Showing posts with label how to. Show all posts

I recently decided to cut off half my hair again and now I am rocking a lob which I absolutely love. I am a really lazy person when it comes to styling my hair so when I have short hair I find it so easy to look like I have put in some effort so I have a few styles which take no time at all and always look nice.

The first style I like to use is my 'I am so lazy today I get be bothered for anything look' which is basically leaving my hair to dry naturally and then turning my head upside down and working the messy wavy look.

My all time favourite hair style has to be the half up half down combo. I think my hair suits me much more when it isn't so thick because I have seriously thick hair so instead of getting my hairdresser to thin it and I regret it, I just throw up half my hair and I'm sorted. I like to use this hairstyle whether my hair is straight or curly as it works with both.

Another hair style I like is the overly straight lob look which I usually wear for nights out or when I want to look quite sophisticated and because I don't have my hair straight very often its a nice change now and again.

Most of the time I curl my hair because I think it suits my face the most and once you've curled it your hair is sorted for the next few days. Also I find when my hair is curly it tends to get greasy not as quick as if my hair is straight which is a bonus.

My last hairstyle is perfect for the spring and summer months and so much easier to do when I have sort hair. I love doing braids during the warmer months because it gets your hair off your face all day and even when it gets a bit messy it still looks good. When I have a middle parting I like to do a braid on each side of my head and then when I have a side parting I like to do a braid on the bigger side.
Photo Links
Natural Waves
Photo One, Photo Two, No Link, Photo Four,
Half Up Half Down
Photo One, Photo Two, Photo Three, Photo Four
Straight
Photo One, Photo Two, Photo Three, No Link
Curly
Photo One, Photo Two, Photo Three, Photo Four
Braids
Photo One, Photo Two, Photo Three, Photo Four

This could be a result of a few different factors (rubbish food and stressful days at work aren't helping) but I have been using a few products that I have found really useful in covering up my blemish skin and making it look even.
Because my skin has been so horrible lately, I have been using these products nearly every day and I've got into a bit of routine in applying them.
Prep
Prepping your skin before you cover it in products is really important not just to help your products last through the day but also to stop them from looking cakey or even flakey if you suffer from dry skin. There are two products that I use to prep my skin before I load it with foundation and concealer, the Simple Oil Balancing Moisturiser and the Christian Dior Pore Minimizer Skin Refining Matte Primer.
The moisturiser is good at giving my skin some added moisture and boost without drowning it and I only need to wait a few minutes before I can start adding my primer. It also helps control shine which we all suffer from now and again.
The primer helps me get a matte looking finish and helps keep my foundation and concealer on for longer, so my horrible red cheeks are hidden for longer.
Together these two products are great as a duo and perfect as a base for under foundation.
Conceal
After I have prepped my face I put my Rimmel Wake Me Up concealer in Ivory on any reddnes on my cheeks and any spots I might have. This doesn't cover the blemishes completely by its self but its does help me disguise my blemishes before I add my foundation.
Cover
Next I cover my whole face in foundation like I would normally do, because I have prepped my face with moisturiser and primer my face shouldn't look cakey or orange with my foundation on too. The foundation works as a mask to even out my skin so that my concealer is now invisible and my skin looks naturally even.
I have been going between two different foundations recently which are the Rimmel Match Perfection in shade Warm Ivory which has a medium to full coverage so is handy on the days when my skin is really bad, and the Maybelline Fit Me in shade 115 Ivory which has less coverage then the Rimmel product so is useful on the days when my skin isn't to blotchy.
Top Up
Lastly, so that my make-up lasts the day and my blemishes stay hidden, I use the Collection 2000 pressed powder in Transparent to set my make up and I then use it through the day to top up my make up and keep it looking fresh. No one likes a patchy face in the afternoon!
I would post a photo of my skin before I have applied these products to show you have good they work but who wants to see my spotty red face, I'm saving your eyes!

I know a lot of people who wouldn't even pick up a pair of ripped jeans because they have no idea what to pair them with (and that was me before I just took the plunge). So I thought I would show you guys some options in how to wear them and what I wear my jeans with.
Jeans and Jumpers
Jeans and Jumpers
I love the look of jeans and jumpers. It is a really cosy look and can be worn at home lounging around and out and about in the cold.





Jeans and shirts
Another style I love is wearing ripped jeans with shirts. I regularly wear these at work as they are so comfy and easy to wear, you can throw on any patterned check shirt with jeans and a pair of boots and your ready to leave.
Jeans and tee's
If you want to look really casual then you can wear a logo t-shirt or even a plain tee with jeans and rock the edgy look that day. I personally love tees with ripped jeans.
Jeans and boots
No pair of ripped jeans is compete without a killer pair of boots to wear with them and I don't wear my ripped jeans with anything else during the colder months, and having an impressive and slightly embarrassing obsession with boots I have a lot of choices to chose from.
*All photos have been used from Pinterest, which you can follow me by pressing here :)*
So today is the 31st of October which means today is Halloween! I love holidays like this because there are always decorations up everywhere and people really get into the spirit and it gives people an excuse to dress up.
Now this Halloween I am actually not dressing up just because my only option of going out is to go into town and I am not doing that in fancy dress! So anyway this evening (or now depending when I put this up) I am going to the cinema with my boyfriend to watch Ouja, hopefully I wont poo my pants in the cinema...
Since I'm not dressing up this year and I didn't have this blog back then I thought I'd show you guys what I dressed up as last year for a Halloween party. I went as the puppet Saw from the gruesome Saw films which are my favourite! I had the help of my sister and her two friends to get me looking creepy. I had work till 6 that night so it was a bit of a rush to get ready in time for the party but we did it.
I bought white face paint to cover my whole face in, black eye shadow to put all around my eyes, I used a bright red lipstick I already had, a red cream blush to draw on my circles on my cheeks and lastly used a black pencil eye liner to draw on my dummy jaw lines.
The funny thing was my over exaggerated eyebrows look like some girls eye brows normally!
For my hair I backed combed the top of it to get it hold for the whole night (which it did) and curled the hair at the bottom. I tried to make it quite messy so that I wouldn't look to 'put together'


For my outfit I bought a fitted white shirt from Newlook to put under my fitted black blazer from there and wore them with my black disco pants from you guessed it... Newlook. I ordered a red dicky bow off eBay which was a bargain!
And my Saw look was complete!

Here are two photo from the party where I still look quite decent haha the first one is of me and a Micky Mouse garden ornament because why not... and the second is of me and my favourite clown Joseph <3


Over the last year, tartan print has been very popular (to the amusement of my mum who used to wear it when she was young) and it seems to be everywhere now.
I know some people are steering clear of this print as they think it is over used and/or they might not be too sure how to put it in an outfit.
The good thing about clothing stores is that when they see that a style or print is popular they make everything in that print, trust me I work in a clothes shop. Therefore you have lots of options of how to wear it, whether you want to go for a bright red pattern or just a plain black and white.
To help you out, here is how I would style the different tartan prints that I have :)
 |
| Top - Newlook Leggings - Forever 21 Shoes - Newlook |

I choose to pair my black and white tartan leggings with a burgundy cami top and black wedges, I picked the burgundy top to give the outfit a kind of a dark/grunge look, but you can also wear it with a bright top like this summery baby blue cami.
I think the leggings give off a great effect when you wear them, as if the pattern moves when you move.
I will be doing a separate blog post just about these leggings after because I think they are so versatile that you can wear them with so many types of clothes.
 |
| Top - Dorothy Perkins Skirt - Internationale |

This skirt is really easy to style, pair it with a plain coloured top or a subtle print and your sorted. I put it with a plain blue chiffon shirt with a really beautiful sequined collar, the design on the collar almost looks like it matches the pattern of the skirt perfectly. Plus the skirt really cinches in your waist!
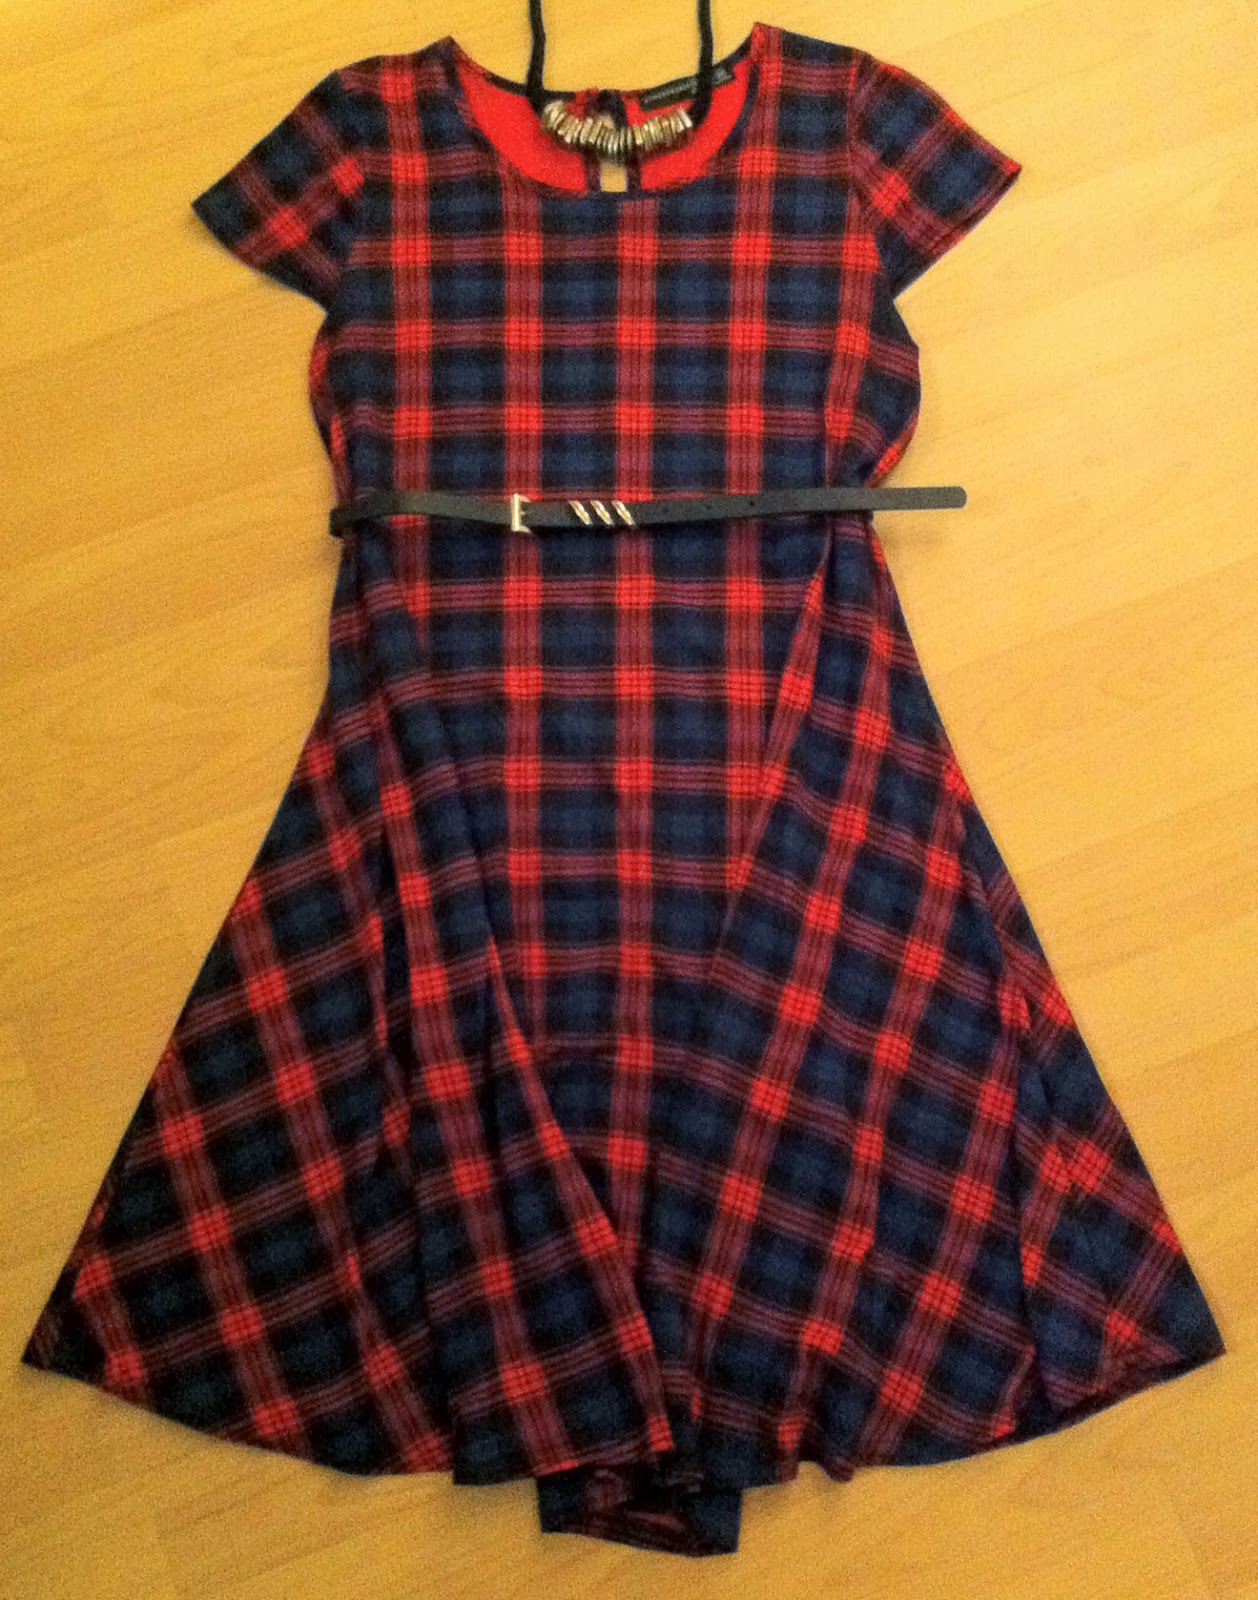 |
| Dress - Primark Necklace - Select Belt - Off a skirt from Newlook |

Lastly here is my tartan dress from Primark. I know most people who jumped on the tartan band wagon have some form of tartan dress, in all shapes, colours and sizes, and this is the style that caught me eye. It is super cute and looks great with chunky jewellery and a black belt. Here is a photo of me the day I wore it, with little black boots, black tights and my leather jacket, it all worked really well together.

Hope you enjoyed this 'How To' post and it encourages some of you to branch out and try some tartan on! :)
Subscribe to:
Posts (Atom)


